Thursday, June 23, 2011

A Cook's Garden

In a perfect world every cook/chef should have his/her own garden. It's been years since I planted a garden. I have delayed, procrastinated, and at times been unable to plant a garden. I finally decided that another year lost would be simply unacceptable. I finally put in a garden this year. There is nothing more satisfying and calming as walking through my little patch each morning, inspecting, picking, and taking in the aromas of my own vegetables and herbs. As a cook, it's really gratifying to be able to select flavors from my own garden.


I am fortunate to have some space to plant a garden with decent variety, but you really don't need much space to plant herbs, or a tomato for example. In fact, you only need a couple of pots to plant your favorite herbs. I have always been irked when a recipe required me to buy a whole bunch of an herb for only 1 TBS. The waste! With a garden, I have the luxury to pick only what's needed.


Here, I have planted marjoram, oregano, spearmint, savory, basil, and cilantro all in the same pot.

If you cook, I really encourage you to plant a small garden or a minimum of a few pots outside your window filled with herbs. Basil, parsley, mint, and thyme are examples of herbs that are really simple to grow and require minimum care. You won't regret it.

Friday, June 17, 2011

Mortadella


The Charcutepalooza challenge this month is to make emulsified sausage. In short, this is the type of sausage that has a smooth paste texture like a hot dog. I did some research on the subject and have decided to make mortadella. Mortadella is an Italian sausage that hails from bologna. We have all seen it in the deli (I took the picture above from google image search.) In it's most traditional form it has a cross-section that shows a pinkish color, dotted with fat and pistachios. However, variations of the traditional can be made by replacing the pistachios with olives, or not using either. The meat is pork shoulder mixed with fat. I'll write more about the process when I make it in the upcoming week. Any suggestions are welcome!

Thursday, June 16, 2011

Charcutepalooza

I recently following a "movement" called Charcutepalooza. It's a celebration of sorts. A celebration of curing, salting, and smoking meat. It's about reconnecting with how our ancestors approached meat before refrigeration. It's also a means to pass on the humane treatment of animals by learning to maximize the use of the animal to prevent a wasteful death, learning techniques of enhancing flavors, and generally reacquainting ourselves with a lost art. The group is comprised of food bloggers who are given a monthly challenge to prepare something using the above techniques and then writing about it by the 15th of the following month. As it turns out, I recently wrote about making sausage and curing duck to make duck prosciutto which coincidentally were two of the past challenges. The challenges are posted on Mrs Wheelbarrows Kitchen.
   
I invite you to join in or follow along and make any comments or suggestion to enhance my challenges. July's challenge is sausage emulsification which is the process that transforms a sausage into a smooth textured sausage as in a hot dog or bratwurst. I have never done this process, so it'll be fun for me to learn a new technique.

Monday, June 6, 2011

Le Cordon Bleu London

I was in London last week, so naturally I decided to pay a visit to the London campus of Le Cordon Bleu. Similar to the Paris school, it is located on a narrow side street in a humble non-descript building. It looked even smaller than the Paris LCB if that's possible. For some reason I  had expected this school to be bigger. Upon entering I went to the receptionsist to ask a few questions. I told her that I had attended LCB in Paris, and asked if it was possible for me to either tour the school or, even better, sit in on a demo. She wasn't impressed with my alumni status. In fact, she was kind of a snotty young girl with an attitude and seemed to be annoyed that I was bothering her. Not that I expected the red carpet, but come on! At least be a little polite.

I asked about the number of kitchens. Three plus a pastry kitchen and a boulangerie. One of the demo rooms was visible directly from the reception office. It was packed with students and looked very cramped. Not sure why LCB does not invest in more spacious facilities.

The receptionist did give me the card for the sales and marketing administrator to make my special request. They do provide tours, but they must be arranged in advance. However, unlike the Paris LCB where anyone can pay to sit in on a demo, the London campus does not allow it. I'm coming back next week, maybe I'll try again. It would be nice to see one of their Intermediate demos to compare the quality and style of instruction with that of the Paris school.

Wednesday, May 25, 2011

Making Sausage Part II

 It was time to revisit sausage making since the last batch I wrote about a few months ago. There are many things I learned from my last experience that would hopefully make this a better sausage making experience. Here are a few problems/errors I had encountered the last time:

-I did not use an ice bath while working with the meat
-Sinew had caused binding with the grinding blade and dye
-the plastic pusher introduced air into the grinding chamber and caused some headaches mostly during the stuffing phase
-the meat mix was dry because I had not used any fat other than the natural fat within the pork shoulder
-my sausage girth was not consistently the same diameter
-During the stuffing, I allowed the sausage to just feed on to the counter top which created some mess and didn't keep the meat cold.
-I was not very thrilled with the spice blend I used the last time.

So, with all of this in mind, I decided to make another batch.

I began the night before by placing all of the grinder parts, and my mixing bowl in the freezer. Keeping everything cold allows for the meat to be ground more easily and more importantly prevent harmful bacteria from forming.

I started by ordering 5 Lbs. of pork shoulder and 1 Lb. of fat back.
I made my own spice blend consisting of the following:

ground fennel seeds
ground black pepper
ground dry onions
garlic powder
ground dried serrano peppers
paprika
dried parsley
dried Oregano
dried basil
sugar
salt

I adjusted the ratio of the above to match with the quantity of meat and what I thought would be a nice balance. I mixed all of the spices in 1/2 cup of white wine and 1/2 cup red wine vinegar.

The following day I ground the meat and fat back together. I allowed the ground meat to fall into a bowl sitting in an ice bath to keep the meat cold. Ground meat is the most susceptible form of meat to bacteria if allowed to warm. I stopped several times during the process to clean out the sinew. Next, I mixed the spice blend and the meat by hand. I did this quickly to prevent my hands from making the meat warm. I placed the meat in the fridge and allowed to sit overnight to allow the spices to meld with the meat.

I cleaned all of the grinder parts and placed back in the freezer for the stuffing phase the following day.


Next day, I made a "test" burger and was very happy with the flavors, so no seasoning adjustment was necessary. I began the prep for stuffing. I assembled the grinder with the sausage stuffer nozzle. I placed a pan in an ice bath below the grinder to catch the sausage. I used speed 2 on the grinder to keep things moving slowly so I could control the girth of the sausage and manage the prevention of air into the grinder more easily. This worked. I kept the meat supply constant. This is crucial to prevent air from getting into the chamber. The process went very smoothly. The entire process seemed more efficient, smoother, and cleaner. 


Sunday, May 22, 2011

Cauliflower Couscous Salad

I made this salad for friends a few days ago. It was a big hit. It's beautiful, elegant, and tasty. It's a prefect little meal for a vegetarian, or a nice starter for a summer lunch. The white ingredient on the bottom is the real show stopper. It's cauliflower disguised to appear like couscous. Simple in appearance, but labor intensive; however, I think it's worth the effort.


Here is how I made it:

Ingredients for 6 servings:

18 leaves Bok Choy
12 small carrots
3 turnips
18 arugual leaves
12 cherry tomatoes
12 asparagus sticks
1 head of cauliflower

Olive Oil
your own vinaigrette (I made it with champagne vinegar, white wine vinegar, dijon mustard, meyer lemon syrup, garlic confit, and olive oil)
Finely chopped herbs (I used chives, parsley, and mint)

Directions:

The next steps can be done a few hours before service.

1. prep the vegetables by trimming bok choy, trim asparagus by cutting the inedible part of the stems, cut turnips in 1/4's and then shape them (Turning), trim carrots and cut lengthwise into 2 or 4 pieces depending on the thickness of the carrots.
2. Bring a pot of salted water to boil. This will be used to blanch the above vegetables.
3. prepare a bowl of ice water
4. Blanch each of the vegetables separately in their like groups just until they are cooked but still firm and barely crunchy. Immediately remove from the hot water and place in ice water to stop the cooking and to retain the vibrant color of the vegetables. Begin with the turnips, then the greens, then the carrots to prevent color contamination.Leave in the water only until they are cooled, then remove and place in a tupperware lined with moist paper towels to keep the vegetables moist. Don't leave in the ice bath too long as this will result in loss of flavor and  nutrients of the vegetable. Place in the fridge until ready for plating.
5. For the cauliflower couscous, remove the florets from the stems. Place in a cuisinart and pulsate until finely chopped similar in size to grains of couscous.
6. Bring to boil just enough salted water to cover the couscous. Drop the couscous in the water and cook for 1 minute. Strain with a fine mesh strainer and then immediately dip the strainer in the ice bath to cool the couscous. Once cooled, empty the strainer on a cutting board and use paper towels to blot ALL of the moisture out of the cauliflower. Next, place the cauliflower in a bowl, add olive oil, some chopped herbs, and s&p. Taste as you do this until you arrive at a balanced taste.
7. Using a ring mold, and your salad plates, pre-form the cauliflower couscous on each of the plates and place in the fridge. You could do this during service, but I find it easier to do ahead.
8. Cut cherry tomatoes into 1/4's and cover, but keep at room temp.
9. Make your vinaigrette


At Service:

1. place all of the vegetables (the bok choy, carrots, turnips, asparagus, arugula, and tomatoes) in a bowl, add the vinaigrette, chopped herbs, and S&P. Taste to make sure it tastes the way you like it.
2. Build a stack of the vegetables on top of the couscous. I like to place the vegetables individually to equally portion the ingredients and to construct a visually appealing stack.
3. Using a spoon, drizzle the plate ,in a circle, around the salad.

Enjoy!

Sunday, May 15, 2011

Mandoline

You may wonder how some ingredients are cut so precisely at a restaurant. Sometimes it's the result of the cook's superior knife skills, but most likely it's the product of a mandoline. It's construction is simple with a blade and an adjustable ramp which changes the thickness of the cut. Using a mandoline assures straight , symmetrical cuts of equal thickness. It's prefect for quickly slicing humble ingredients like a potato, or carrot, but it can also be used to create more elegant results. Here are a few examples of how I use the mandoline in my kitchen:


I like using the mandoline to create ultra thin sliced products which add a delicate elegance to a dish. One of my favorite examples is to create radish discs for use as a garnish. I usually slice a few radishes and then store them in water. They can be used to add elegance to  a dish or salad.

The mandoline is ideal for thinly slicing onions. I like to slice

red onions, add red wine vinegar and sugar to create pickled red onions. They can be stored for months and used for all sorts of garnishes such as salad toppings, plate garnishing, and addition to any appetizer plate.


Candied Lemon wedges


I use the mandoline to disguise the oft disliked Brussels sprouts into something more desirable. I find that most people seem to dislike the whole sprout, so I shred them using the mandoline. A simple preparation is to saute the shredded sprouts in butter, add some crushed toasted walnuts, a few drops of lemon juice, and salt/pepper. Voila! A simple side dish, and no one will guess that it's made with brussels sprouts. Below I used the sprouts as a garnish for the hangar steak.


Sunday, May 1, 2011

Wood Fired Pizza Oven


It was "Passport Weekend" in the wine country. An event that allows guests to purchase a ticket and roam between participating wineries. The event showcased wines with appropriate food pairings. The Chef chose to cook pizzas for our event. It was a warm summer day....perfect for a wood burning pizza oven on the back deck of the winey, with a sweeping view of Napa valley.

The Chef loves using the wood fired pizza oven to create not only pizzas, but rustic Italian dishes. However, today was all about pizza. We were a team of 4 plus the dishwasher who also helped when it was busy (our pizza team pictured above). The dough and the mise en place for the pizzas had been prepped the day before, leaving only assemblage and cooking for today.

Here are some interesting facts about the oven. This particular brand costs about $15,000. There is a specific method of building a wood pile to start the fire inside the oven. Once started, the wood is moved around the oven to heat all sides of the interior, and then eventually moved off to one side. With the wood on one side, the flames actually arc from one side to the other around the interior of the ceiling.
The temperatures reach between 700-1000 Deg. F. The stone "floor" of the interior is then wiped clean with a wet towel, and you are good to go. The efficiency and heat generation is fantastic. It only takes a few minutes to cook a pizza in the oven.


We made 4 hot pizzas and one cold flat bread pizza:

1. Basic tomato sauce, pepperoni and mozzarella
2. Roasted garlic paste, braised chanterelle, black trumpet mushroom, and 5 mixed cheese
3. Herbed ricotta, asparagus, pancetta, and mozzarella (pictured above)
4. Gluten free dough version
5. Vegetarian pizza
6. Flat bread, topped with herbed creme fraiche, smoked salmon, hard boiled quail eggs, pickled red onion slices, and tarragon.


We made over 200 pizzas in 5 hours. It was a great venue being outdoors, working in a beautiful environment, surrounded by some very happy people. I never worked in a pizza place as a kid, so it was nice to work with dough and the oven.

We received positive comments all day regarding the flavor of the dough. The Chef has kept a "mother dough" alive for 5 years. This is the source of all the dough made at the winery thus preserving that taste character that makes it uniquely flavorful. 


Thursday, April 21, 2011

Butchering a pig


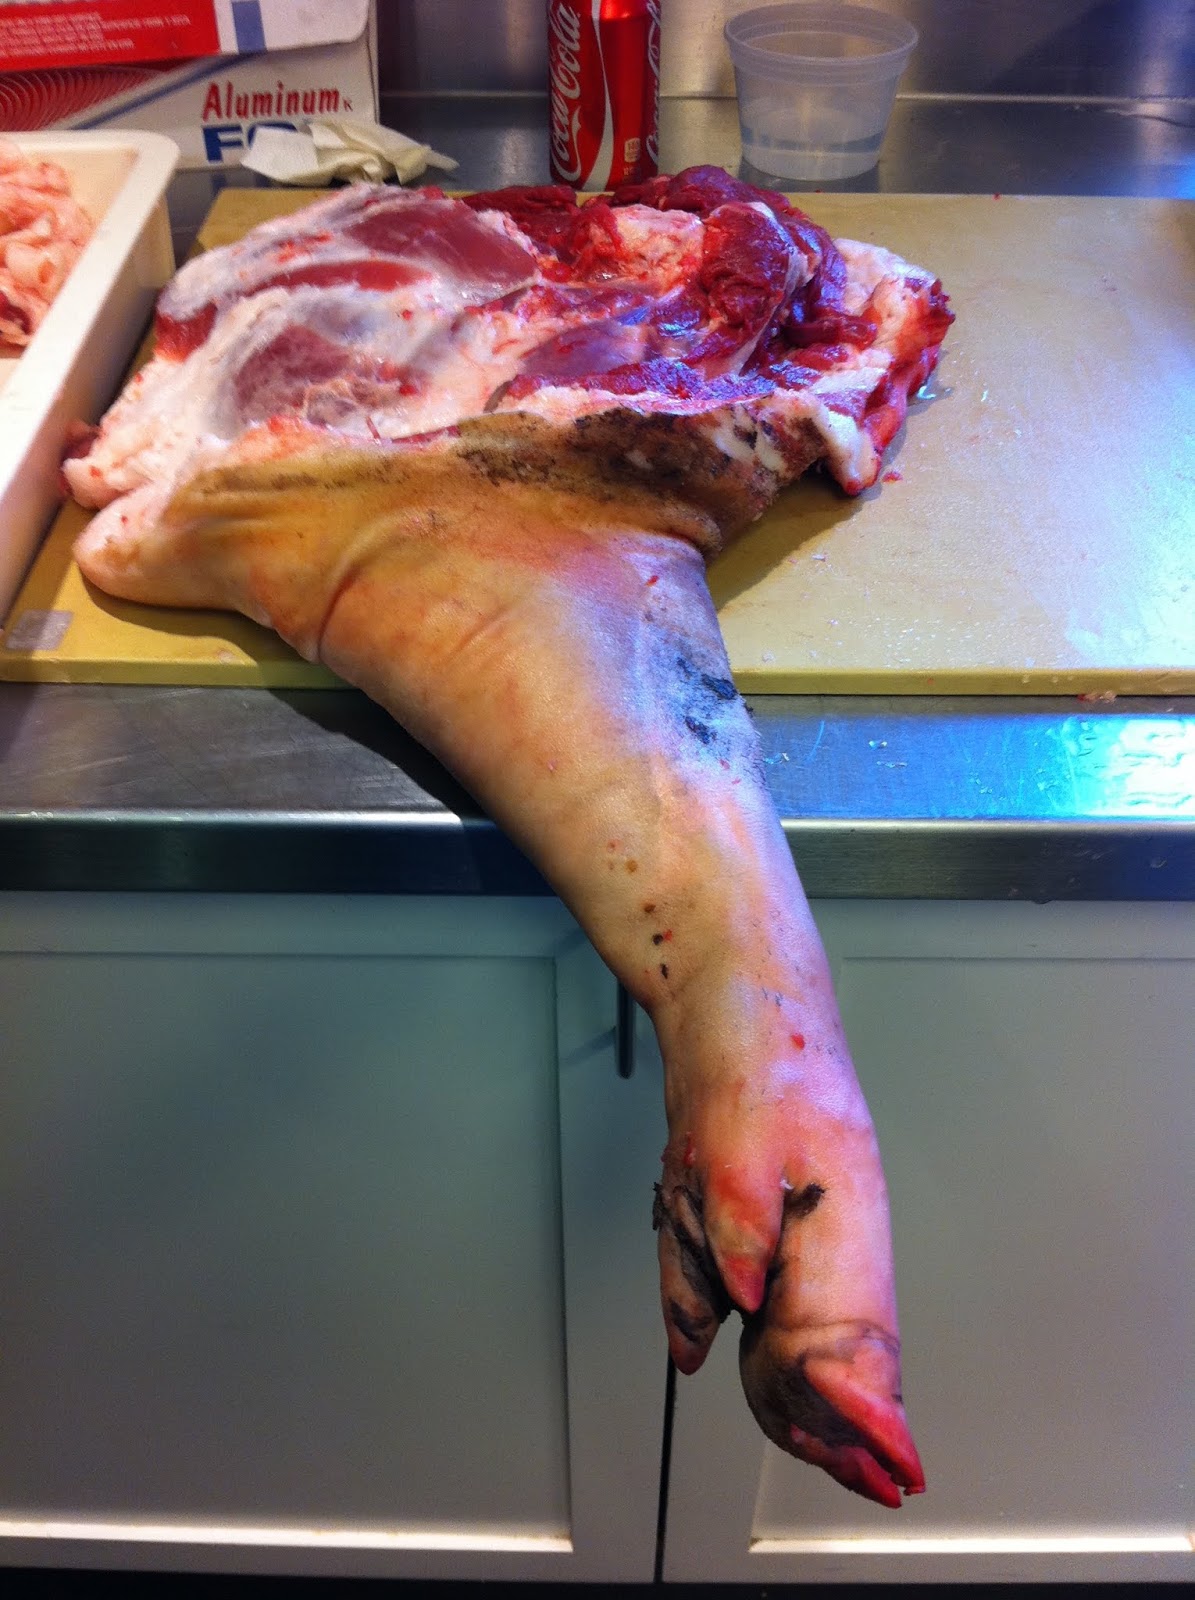
I went to the winery for 2 days of work. A private lunch and a private dinner were on the agenda but the real surprise was the delivery of a pig. I didn't plan on this, but my timing couldn't have been better. The Chef revealed the delivery to me after a couple of hours of prep for the dinner event. I said "this will be a great experience to watch you butcher the pig", to which he replied "You're not watching, you'll be helping me"! Awesome. There were 4 of us there to dismantle the pig for its various uses. This was no ordinary hog, it was a "mangalista" breed pictured above. It's a unique pig because of its fur and the 4" of fat underlying the skin. It's origin is from Hungary and the Balkans where it was bred for its large amount of lard. Through the years, it's popularity waned to give way to less fatty hogs until recently when there has been a resurgence of demand for the breed. A local farmer breeds them for high profile restaurants like the French Laundry.

It was delivered to us with the head removed and the carcass sawed in half lengthwise.


We went to work as soon as it arrived. The first task was to remove all of the meat along the inner halves of the body and remove the legs with the shoulders intact.


Then we separated the meat, fat, skin, and the bones. The fat was placed in large roasting plans and placed in the oven to be rendered. 

Next, I got to debone 2 of the legs, remove the skin, then cut the fat/meat into 1"-2" pieces. This was to be eventually made into salami. My boning knife really got a workout on this one. The next day, I ground all of this leg meat, made a spice blend, and then combined the two with a mixer.

The remaining 2 legs were kept whole to be cured for proscuitto. The Chef had me make a roux with equal portions of rendered fat and flour. This was a technique I had not seen. The roux was used to seal the exposed portions of the leg meat for the curing process.


Also, the next day, I cooked all of the bones and attached meat in the rendered fat. Once cooked, I removed all of the meat which will be used for carnitas.


The head was cooked in water all day. When removed, all of the flesh had fallen off the skull. The meat will be used to make ndjua.

The fat back and spice mix were combined for curing to make lardo.

The skin was cut into strips for making pork rinds.

Every part of the pig was used. It was a great experience to see the process. Seeing the animal from start to finish makes one appreciate and respect it. You want to waste nothing so that the animal's death is purposeful and meaningful. Another great learning session at the winery.

Thursday, March 24, 2011

Ring Molds

We "eat" with our eyes just as much as with our sense of taste. The anticipation of how the food will taste is piqued with visual beauty. Some dishes such as stews are meant to be served with a rustic appearance, but some dishes, no matter how humble, can become elegant and desirable with the use of ring molds. Ring molds come in many shapes and sizes and are inexpensive. I have a set of square ones, a set of circular ones with serrates edges, and 2 circular ones that I use most frequently. You can
buy them at most kitchen stores and are usually found in the bakeware section. Below are a few examples of how I have used my ring molds to elevate my dishes to the next level:


Wednesday, March 9, 2011

Agnolotti


I have been knee-deep in checklists, procedures, and system diagrams as I have been training on the Boeing-777 in Dallas (Cooking Hiatus). Fortunately, I have been able to come home for short breaks every week during this 6 week training program. California and my kitchen are both welcome sights during these breaks. My hectic studies, and my training location have left little time or opportunity for good food, so I have been VERY eager to cook when returning home.

Last week, I wanted to spend one of those quality days in my kitchen with no people or distractions. I decided to make agnolotti stuffed with sausage served with tomato sauce. Agnolotti is a style of ravioli that hails from the Piedmont region of Italy. It's not the traditional ravioli that comes to mind when one hears the word "ravioli". I first saw it made during my Internship at the restaurant and was immediately enamored with the technique of making this beautiful pasta. The agnolotti can be filled with any type of filling in the same way as traditional ravioli. In this particular instance, I chose to stuff it with a mixture I made with my homemade sausage as the base. I will just share the technique for making the pasta and the agnolotti and leave the stuffing and sauce up to you to match your own creative desires.

I started by making pasta dough. I love using ratios to avoid referring to recipes whenever the opportunity lends itself. Here is a simple ratio whenever you want to make pasta for any use:

100 g flour
1 egg
pinch of salt

It's that simple! I like to make pasta by using my hands rather than the mixer. It's just a personal preference because it allows me to know the exact state of the dough (too dry, lumpy, too moist) and what it requires to make it perfect. I also like to pretend that I am some old Italian dude making it the traditional way by spreading the mixture on my counter instead of mixing the dough in a bowl.


I make the traditional "well" with the flour and then add the eggs in the middle. Initially, I stir the egg with a spatula by making circles in the center of the "well", and slowly expand the circles larger and larger to slowly incorporate the flour into the egg. Once all of the egg and flour are mixed, I place the spatula aside and start working the dough with my hands. Initially, it may be lumpy as shown below:


But the goal is to work the dough until it's nice and smooth like below. If the dough is too dry, add just a touch of water. If it's too moist slowly add four to absorb the excess moisture. After making pasta a few times, you'll learn how to judge the perfect balance of flour and moisture.


Next, I allow the dough to rest covered for 20-30 minutes. I then roll it out into large thin sheets using a pasta roller shown above. The technique is to begin with the lowest setting (1) and gradually roll the strips of pasta thinner and thinner until you reach the desired thickness. I usually take it all the way to setting 9. A good rule of thumb is a thickness that allows you to see your hand through the pasta when you place your hand underneath the sheet.

Now you're ready to construct your agnolotti. You would need to make your filling ahead of time because this is the time that you would need it. In my case, I made my sausage filling beforehand and placed it in   a pastry bag ready to be piped. Rather than a longwinded explanation, we all know that a picture (or video) is worth a thousand words. I found a great U-tube video that perfectly demonstrates how agnolotti is made. Notice the rather ho-hum, bored looking wife in the background!


Here's my finished product:

To cook, simply bring to boil a pot of water and salt, and drop the agnolotti into the water. They will rise to the top when cooked. It should take only 1-3 minutes if you cook right away, and not much longer if you store before cooking. I like to store the agnolotti uncovered in the fridge on a parchment-lined cookie sheet, and dusted with flour so they do not stick. Enjoy!


Wednesday, February 23, 2011

A cooking Hiatus

I have a new assignment with my airline job which has brought me to Dallas/Ft Worth for 6 weeks of training to become qualified on the B-777. Although great news in terms of my airline career, it translates to 6 weeks away from cooking at home, at the restaurant, and the winery. I am trying to adjust to the "lovely" cuisine in Irving, Texas (so I'm not really in Dallas, but nearby, or else the food choices would be better). This is the land of everything LARGE to include waist lines, the number of electronic devices strapped to people's belts, hairdos, food portions, and the amount of batter glooped on to all foods and vegetables. And, why do people from Texas always have to announce that they're from Texas? Get me outtttta here!

Friday, February 18, 2011

The Scraper

The kitchen scraper is a common tool for bakers, but I had never used one until I went to Culinary School. At Le Cordon Bleu, each of us received one as a part of our issued "kit". It quickly became an indispensable part of my kitchen.I now use it for so many kitchen tasks both at home and at the restaurant that I wonder how I got along without one.

Here are some uses for this versatile and inexpensive tool:

-During prep on a cutting board, use the scraper to scoop up chopped herbs, onions, garlic, etc..
-Use to scrape work surface clean after preparing dough
-Use to scrape any work surface clean. Most useful if surface is a dark color that allow small food scarps to visually blend in.
-Use to scrape off dough from rolling pin
-Use to scrape the inner side of a sauce pan or pot above the food surface to prevent burning of residual food that is stuck on the sides of the pan.
-Use the rounded side of the scraper to scrape clean the contents of a bowl.
-Use the straight edge as a measuring device for cutting dough or sheets of pasta
-Use the straight edge to cut dough, pasta, etc...
-Use to remove or scrape off anything that is baked on a cookie sheet instead of using a spatula

I highly recommend trying one in your kitchen. It also make a great little gift. Scrapers come in many sizes and colors and are available at most kitchen stores. The one pictured above is the one that was issued to me at school and can be purchase at the following store for $4.38

Saturday, February 5, 2011

Winery cooking demo

Another winery event brought a call form the Chef. This was the big annual event for the winery with a couple of thousand guests expected to enjoy the release of the winery's flagship wine. Included in this festive faire were 5 prominent local Napa Valley Chefs each providing a demo as well as cooking representative food from their respective restaurants for the crowd. I wasn't sure what my duties would be when I arrived. It was great seeing everyone again. The winery chefs are all from other restaurants or just free lancers who come together as a team for events such as this. As it turns out, only 2 of the group was assigned to actually cook. They cooked the family meal for the over 200 employees who were hired for this event. My duties were to assist the 5 restaurant chefs with their demos. I was to serve as their liaison to the winery's kitchen and equipment. The great thing about this assignment was that I met and briefly worked with each of the 5 Chefs! Very cool. Here I am with the Winery Chef waiting to greet the 5 Chefs as they arrive with their crew and equipment. Beyond that, my duties were to generally assist with the event form dealing with people, fielding food questions from the crowd, equipment, assembly/disassembly of some cooking stations, etc...No cooking but a fun event.

A few pics from the event:


Michelin Starred Chef Ken Frank of La Toque
How to properly cook meat in a pan


Chef/Owner Donna Scala and Executive Chef Scott Warnerworking the Bistro Don Giovanni's setup

Wednesday, February 2, 2011

Caul Fat

I am not so sure I like quiet nights at the restaurants. Sure, it's a break from stress, but the time tends to creep when there is not much going on. This is the slow season in the wine country despite the amazing almost 70 degrees sunny day we were having. I really have no designated duties at the restaurant. I just show up and the cooks either fight to give me stuff to do, or like last night, since everyone was caught up they didn't have too much for me. The Chef told me to begin by chopping the herbs. So I did that.

"What next Chef?" Apologizing, he said that he had some "shit work" for me if I wanted to do it knowing that it wouldn't exactly improve my culinary skills. "Give it to me." Just keep me busy were my thoughts because that clock almost stops when there is nothing to do. So, I bagged about 30 quarts of chicken stock, 22 quarts of veal stock, and vacuum packed some marinated truffles.


Finally, the meat cook gave me something fun to do. He has always taken care of me. This kid had me sautéing scallops with him on the line on the very first day of my internship. Tonight he wanted me to finish preparing the main ingredient for a dish called pavé a la bourguignon. It's a nifty twist on the traditional beef bourguignon. The dish is made in the traditional way, except, once cooked, all of the vegetables and meat are strained out. The braising liquid is then reduced to a demi-glaze. Then the vegetable and meat are added back in. The stew is then placed in a pan with a weight on top to compress it and then cooled in the fridge where it solidifies. It is then cut into blocks. Hence, the name pavé which means square stone tile or paver in French. Next, each block is wrapped in caul fat. Caul fat is the membrane that surrounds the internal organs of an animal. Typically beef or pork caul fat are used. It's an excellent way to hold together
an ingredient such as forced meat, or rolled meats. When ordered, the  caul fat wrapped pavé is placed in a hot saute pan where the fat initially contracts to hold the pavé together and then slowly melts away as it's heated keeping the pavé moist and imparting a light bacon flavor. It's a really tasty dish. My job was to wrap the caul fat around the blocks. Not earth shattering work I do admit, but it allowed me insight into the creative method of preparation for this tasty dish.


Sunday, January 30, 2011

Oeuf En Cocotte

I was playing around on the web looking at old PBS videos and came across a very cool technique. It was featured on an episode of "The French Chef" with Julia Child. The dish is called oeuf en cocotte. The word "oeuf" of course is French for "egg", but I had to look up the word "cocotte" in the French dictionary to satisfy my curiosity. Here is what I found:

Definitions of cocotte on the Web:

• prostitute: a woman who engages in sexual intercourse for money
• a small casserole in which individual portions can be cooked and serve

I assume the second definition is what I was looking for. It is an egg along with various ingredients all cooked in a ramekin. The method is to cook the ramekin in a bain-marie. I received a nice set of Le Creuset mini-ramekins for Christmas that I have been itching to use. Here was my opportunity. There is something elegant and sensous about cooking food and serving it in the same individual dish. 


Last night, I had a guest over for dinner  who arrived too hungry to be able to wait for dinner, so I made the above pictured oeuf en cocotte as an impromptu appetizer while I cooked our dinner. Here's how I made it:

Ingredients for 1 serving:

-1 egg
-some butter
-2 mushrooms, finely chopped
-1 TBS Creme fraiche
-1 TBS grated cheese such a parmesan
-1 tsp chives, finely chopped
-1 tsp parsley, finely chopped
-salt & pepper

Direction:
-Preheat oven to 350
-boil enough water to fill an oven proof pan 1/2 way up the side of the ramekin
-In a saute pan, saute mushrooms in some butter. Season 

with salt and pepper. Sprinkle with chopped parsley. Set 
aside.
-fill the bain-marie pan with the boiling water
-butter the inside of a ramekin
-place sauteed mushrooms in the ramekin
-add the creme fraiche
-place ramekin in the pan
-allow a few minutes for the ramekin to warm
-break the egg in to the ramekin
-top with a sliver of butter
-season with salt & pepper
-add grated cheese
-place in oven and heat until the egg white sets and the yolk is the way you like it. You'll know by jiggling the pan. This should take 10-15 minutes.
-remove the ramekin with some tongs and allow to cool for a few minutes
-add the chives as garnish and serve.


This recipe can be varied in many ways with your imagination as the limit. You can use ham instead of the mushrooms, or sauteed vegetables, or salmon. The herbs can be whatever you prefer like basil, tarragon, or chervil. The cheese can be changed from parmesan to gruyere. You get the point. The choices are almost infinite because eggs are compatible with so many ingredients. It's an extremely simple and versatile method of presenting an egg that elevates it from the the every day pedestrian egg on a plate.

Wednesday, January 26, 2011

Food - The Ultimate Equalizer

I am in Miami for the day with my airline job. I am always in search of good food here and I am most often disappointed, not because of Miami, but because my layover location is not the best in Miami. It's not the trendy South Beach, nor is it Coral Gables, or Coconut Grove. I am staying near the Miami airport where my choices of decent dining are very limited. There are lots of strip mall style stores, cafes, and nondescript restaurants- all of them latin. Cuban food is king here. On this rather gloomy FL day, I went out for lunch and explored some of the less trodden, rather shady looking streets and came across a very authentic Cuban place, not very originally named "Havana Cafe.". This place was the real deal with the walk-up espresso window and not much evidence of the English language to be found inside. It was a local's hangout. I went in despite the not-too-friendly glares.

I lived in FL for many years. There has always been a divisive prejudice between the Cubans and the non-Cubans. Don't ask me who is at fault. I don't know. Today I felt that prejudicial eye as I sat at the bar and prepared to order. I was generally ignored, my order was taken without a smile, and all of my English was met with replies in Spanish. I ordered a Cuban Steak sandwich which was priced at an incredible $4.50! I could have actually been in Cuba with these low prices. My cafe Con leche came first. I have to admit, the Cubans have a great coffee ritual. As I drank the coffee, the cuban music filling the air, I remembered a passage in Julia Child's book "My Life in France" where she was annoyed with Americans who found things to complain about the French culture rather than embracing all of the wonderful qualities of the French. Maybe I can do the same here. My heartbeat slowed almost immediately at the thought and my anxiety level came down a notch.

My steak sandwich came. A very humble looking sandwich on a white bun in a plastic basket. With low expectations, I took a bite and was really rocked by how good it was. There was some sort of rub/marinade on the meat that gave it a great "tangy" flavor. Hmmmm. "This is pretty good" I though to myself.  After finishing my meal, I told the waitress that the steak was really good and asked if she knew how the meat was prepared. It was as if I had found the key to unlock the barrier between us. She smiled and responded in English that she would find out. She went into the kitchen and returned with the cook (an older Cuban woman) in tow. The Cook proudly explained, through translation by the waitress, how she made the marinade/rub. Truthfully, I didn't fully understand all that she said. I was too caught up in suddenly becoming an "insider". The graciousness didn't stop there. When presented with the bill for a whopping $5.45, I was told that I could not use my credit card unless I had a $10 minimum. Having no cash on me, I offered a tip of $4.55 to bring the total to $10. She refused and wanted to give me the meal for free! After a few back-and-forths, I finally won and paid the $10. I had gone from being a lowly non-Cuban stranger to being offered a free meal in a mere 30 minutes.

There are so many lessons to be learned here that I don't know where to begin. I'll just keep it relevant to this blog. Food.....We all need it. We all go about making it differently. Each culture celebrates their food differently.  Yet, in the end, it's the one thing that all humans have in common that can bring us together - our love for food. Food is the ultimate equalizer.

Friday, January 21, 2011

Duck Proscuitto

I have been fascinated with the idea of curing meat. Long before refrigeration, this is how people stored meat. A little research revealed that curing meats has been around since the "ancient times". The are several forms of curing, but dry curing with salt is one of the simplest. I have always been a little intrigued by things of the past, so I decided to apply this old techniques to the duck breast and make some Duck Prosciutto. There is a lot of info on curing duck breast on the internet since it was popularized by Michael Ruhlman's book "Charcuterie" (which I have not read.)

WARNING! This is a method that I used without any prior experience. I am not an expert in curing and am not suggesting that you follow my recipe. I am just sharing information. Proceed at your own risk!


I bought a magret duck breast for this project. Magret is the breast of a moulard duck which has been fattened for the production of foie gras. It is known for its rich flavor. I rinsed the breast and dried it. I then made a mix of kosher salt and sugar (80% salt/20% sugar) enough to cover the breast in a non-reactive container. The goal is to pack the breast completely with the mixture. The purpose of the salt is to draw out all of the moisture which will in turn slow the production of harmful bacteria. The sugar adds flavor and counters the hardening effect of the salt. There are various flavors that can be introduced with the addition of herbs. In this case, I didn't use any. I then covered and placed in the fridge for 2 days. This allows time for the salt to do it's job.

Next, I removed the breast from the fridge, thoroughly rinsed the salt/sugar off the breast and then dried it with paper towels. Next, using cheese cloth, I wrapped the breast and tied it with kitchen string in a fashion that would allow me to hang it.

Temperature and humidity are critical: The ideal temperature for curing meat is 36-40 degrees F. Below 36, the process slows down too much and the longer process causes excess loss in the flavor. And, above 50 degrees, spoilage occurs. The level of humidity is also important to allow for the evaporation of moisture to occur. I wanted to cure the meat in my garage. Winter temperatures and humidity levels (in California) are ideal for curing. Otherwise, curing can be done in a fridge.

Weight: After wrapping the breast in the cheese cloth, I weighed it. This is important because the cure is complete when the breast has lost approximately 30% of its weight. In my case, the weight was 404 grams. So, my target weight for completion was  282 grams. (In researching the weight reduction goal, I came across numbers ranging from 20% to 30%, so I chose to go with the most conservative number which was 30%)


I hung the breast in my garage mid December and it took over a month for it to reach the target weight. I checked and recorded the weight weekly to monitor the progress of the cure. Initially, the weight dropped quickly during the first week. It then slowed to a few grams per week. The weight loss essentially stopped before hitting my target. It had only lost about 20% of its weight. I made the command decision to stop the process at this point even though it had not reached the 30% target. This morning, nervous with anticipation, I brought it down and opened it. The color was actually not very appealing. It was a dark brown color. I cut it open and was happy to see a beautiful red color on the inside. I took a bite. The fat melted in my mouth and the meat had the perfect balance of texture, game, flavor, and salt. WOW! It worked, although I still have to wait to see if I will die from botulism.

I cut the breast into 5 equal portions, bagged, tagged, and placed in the freezer. I have lots of ideas for how I will use it. I may even cook some of it and use it on pizza, or as garnish for soup or salad.

I recommend that you read and research this process rather than following my curing technique. There is a lot of technical chemistry and MANY finer points involved in this process that I have ignored. I decided to not to get too bogged down with science and just do what people may have done years ago.