Showing posts with label kitchen tips tricks techniques. Show all posts

Monday, November 7, 2011

How to create your own recipes

There are times when recipes and food combinations are the result of fortuitous luck, but most often sound recipes are the result of planned combination of harmonious ingredients "hung" on to fundamental cooking techniques. If you have a few cooking techniques in your cooking "toolbox", you too can come up with your own recipes. I think the biggest fear for most cooks is fear of failure. You need to get over that one! The worst case is that you end up throwing away the food, but it's important to realize that failure leads to success and knowledge. Every great cook has had LOTS of disasters.

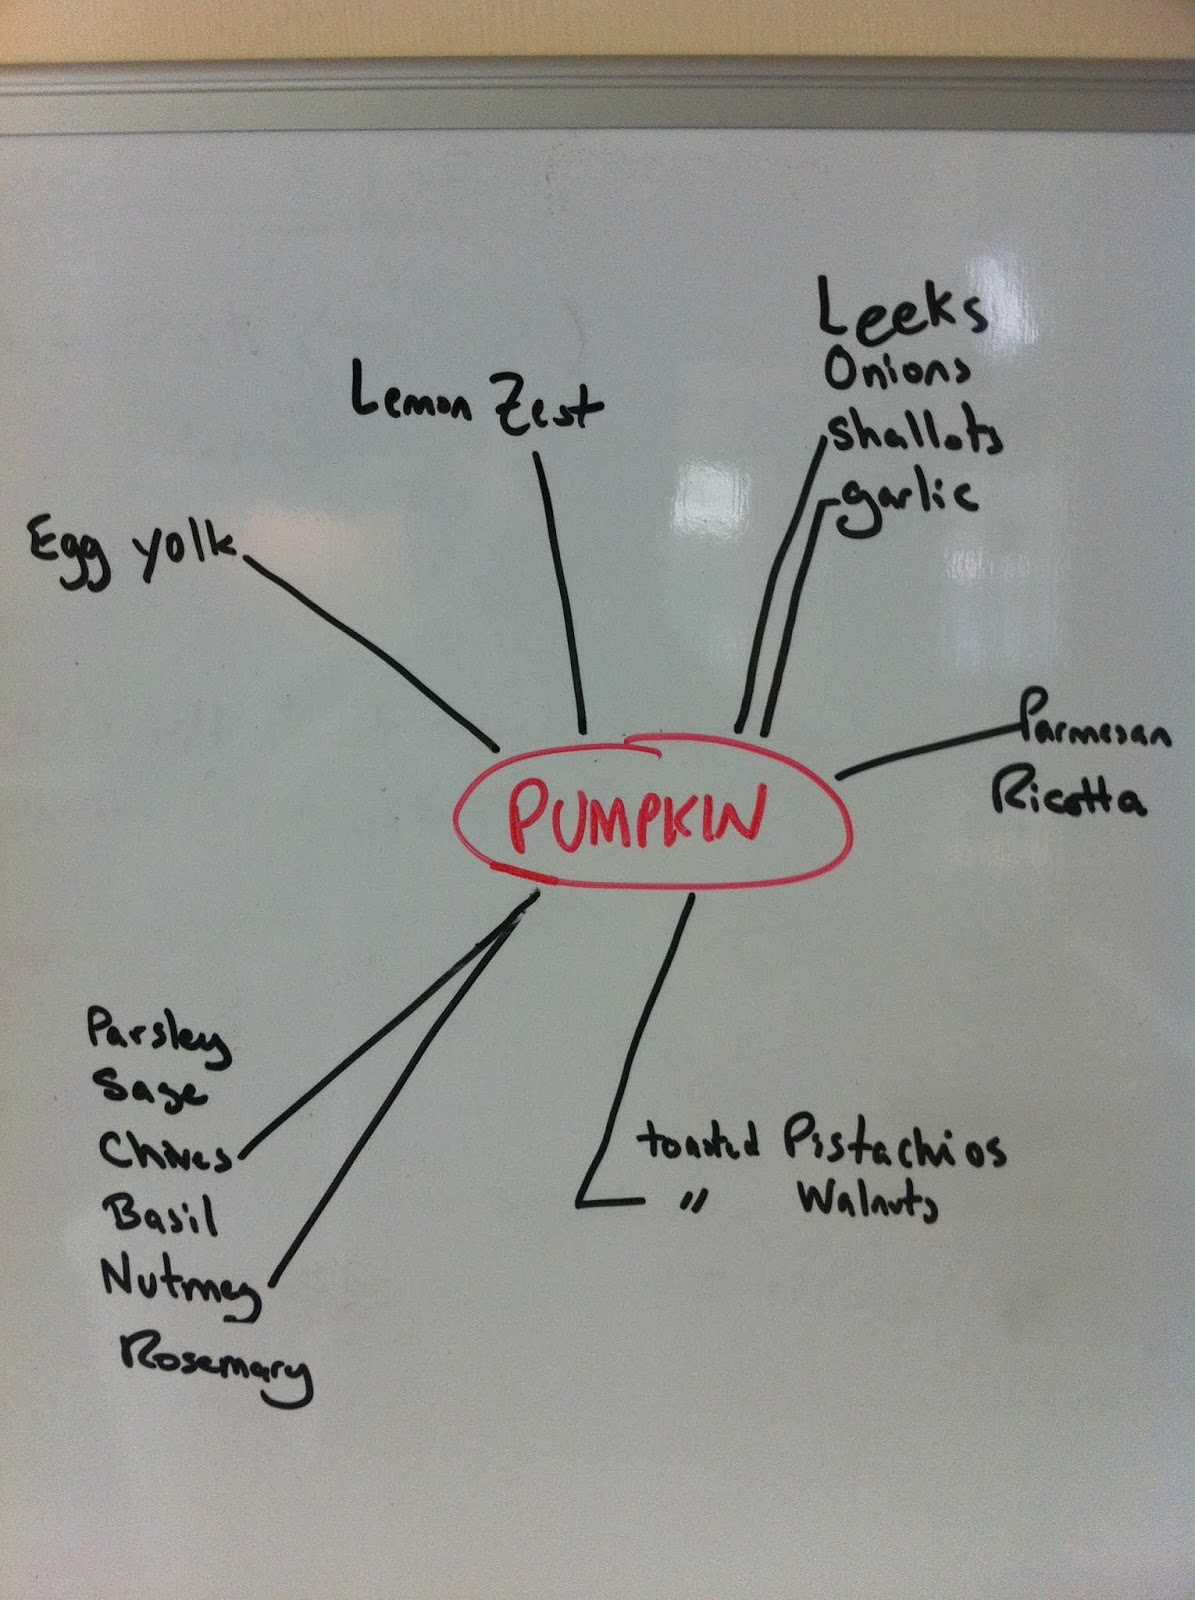
I want to share a method by which you can go about creating your own recipes. I saw it demonstrated by Chef Grant Achatz. This is how he and his staff develop ideas for food combinations, flavors, and texture at his restaurant. My example will be a recipe I created for the upcoming post. The first step is to pick your star ingredient.  I wanted to use pumpkin. Next step is deciding on a technique and the vehicle to showcase the pumpkin. I decided to make ravioli. So, the techniques required are pasta making and more specifically making ravioli. I have those techniques in my "toolbox" so I am good to go.


Here is the fun part! I needed to come up with some ingredient combinations for the pumpkin filling.
Begin by writing you star ingredient in the center of a piece of paper or board. Next, write down all the ingredients that you think would go well with the main ingredient. Juts let your mind flow freely with all sorts of ideas, imagining flavors and textures as you write them down. Now step back and think big picture as you imagine how each ingredient would taste with the pumpkin and how they would taste with each other. In the case of my pumpkin ravioli filling I wanted complementing herb(s) so I thought I would use the chives and nutmeg. I could have used the sage, or rosemary, but I didn't want to meld too many competing flavors. I chose to incorporate shallots and garlic for a nice flavor foundation. I chose lemon zest to add a slight acidity to counter the sugar of the pumpkin. I chose chopped toasted walnuts because I wanted a textural crunch in the filling and the toasted flavor would be nice against the pumpkin, but I could have easily just gone with a smooth textured filling. Finally, I wanted somethings to bind it all together so I added parmesan cheese and egg yolks.

It's important to realize that this is only a starting point. It's just a plan. Always taste! I have not made this dish yet. So far it's just conceptual, but when I compose the filling, I may realize that it's off, or it's missing something. It may not have enough flavor, or it may need something more to keep it dry enough to be used as a filling. Maybe my pumpkin is not sweet enough and I'll need to add some form of sugar. It may be a disaster! The cool thing is that I'll learn from it and get it right on my own.

My palate and my experience may have led me in a direction that is completely different than your's. For example, ethnic cooking experience with Asian or Indian food may have led you to some interesting herbs that I am not familiar with. What I am saying is that, for the most part, there are no wrong or right answers here. Your imagination and your personal taste are the limit.

You can see that the more techniques you have at your fingertips, the more liberty you have with being creative. It's a good idea to study and practice the basics of baking, braising, poaching, roasting, and grilling. Once you know those basics, you can begin honing in on specialties like dough, pastas, forced meats, etc...I encourage you to shed your fears and experiment with your own recipes.

Friday, August 19, 2011

How to add sweetness to food

It seems a simple enough question with a simple enough answer- when food needs to be sweetened, just add sugar.???  Well, maybe that would solve the problem, but there are numerous other ways to accomplish this and, at the same time, also adding flavor complexity to the dish . Many times we need to add sweetness to a dish such as a sauce or a vinaigrette that is too acidic, or a sausage or meat that is too spicy, or simply a dish that needs a sweetness to fully develop its taste and create a more balanced flavor. One obvious method is to take advantage of the natural sugars in the ingredients such as in onions, carrots, prunes, etc... Another way is to introduce sugar through the use of other "vehicles": My secret weapon is an arsenal of flavored syrups.

I have several "go-to" syrups that I use in virtually all of my dishes. The advantage of using syrups over sugar is the added complexity of flavors that a particular syrup brings to the dish. My favorite is pomegranate syrup. Another is the meyer lemon syrup. I use the two in every vinaigrette to counter the acidity of the vinegar and to add a subtle flavored sweetness to the dressing. I like to use syrup in my braising liquid when braising meat. I use it in marinades. I use it in my smoothies. Sometimes, I hide a small dollops of syrup under the dish when plating to add some "hidden" flavor. Somtimes I use syrup as a plate garnish. The list is endless.


Pomegranate grenadine syrup, meyer lemon syrup, 
sangiovese pomegranate reduction, 
red wine orange reduction, and Lavender honey glaze

You don't have to buy syrups, you can also make your own. Whenever I have leftover wine (not that often!), I like to reduce it down to make syrup and store it in small squirt bottles. It's very simple to add flavors to your syrup. Pictured above is one of my homemade syrups: orange wine syrup which I made with a leftover orange a little past its prime. I simply put some orange slices and rind in the wine during the reduction. After some time, I strained all the solids out, and continued reducing the liquid until it reached the desired consistency.

Whenever a savory recipe calls for a sweet ingredient, I immediately think of how I can modify it with a flavored syrup to boost flavors. A great place to find unique syrups are specialty food stores. Give it a try and experiment for yourself to discover that one unique secret ingredient in your pantry!

Saturday, July 9, 2011

The Microplane Grater

The classic image of the waiter at tableside grating cheese is what comes to mind when I hear the words microplane grater, but there are more uses for this finessed kitchen tool. The microplaner comes in many shapes and sizes each designed for a different application. The narrow shape of some microplanes allow the shavings to be more accurately directed to its target. Some planers are wider for larger volume or grating larger ingredients. Some have a fine mesh grating surface designed to create a finer powdered product and some have wider slits designed to create elongated shavings. Here are some ideas on how you might use the microplaer.


A common use is for zesting citrus. It creates fine lemon/lime/orange shavings. The larger slitted planer can be used to create citrus rinds for drink garnish as an example.


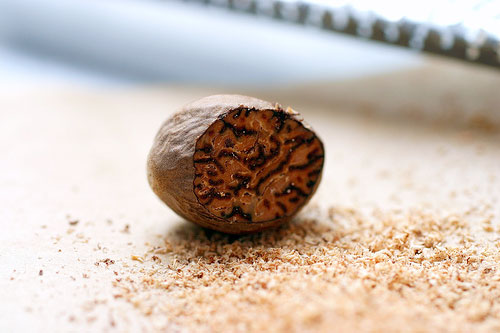
A classic french use for the microplaner is for grating nutmeg. A pinch of nutmeg can be created by rubbing a nutmeg acorn against the grater a few times. The same can be done with cinnamon. Use the microplane to add a touch of cinnamon to a cappuccino or to top a dessert.

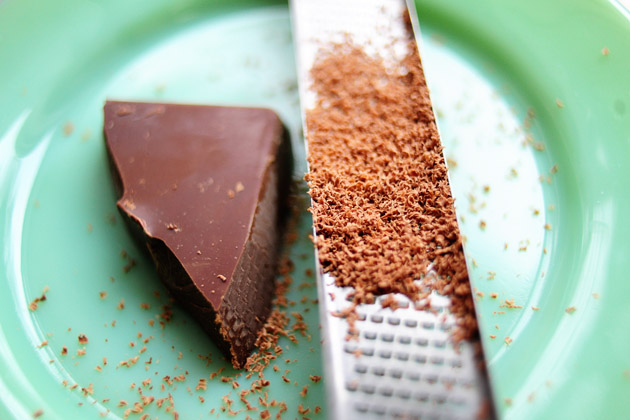
Another great use is to create delicate chocolate shavings for garnish. I like making an espresso panna cotta served in martini glasses. The chocolate shavings are a perfect touch to add refinement to the presentation


Zesting garlic is another use for the microplane. It allows for the super fine shaving of garlic that create subtle flavor without a noticeable
texture or mouthfeel.


As you can see, there are lots of uses for the microplaner. It's a simple, yet versatile tool that is a nice addition to any cook's toolbox.


Sunday, May 15, 2011

Mandoline

You may wonder how some ingredients are cut so precisely at a restaurant. Sometimes it's the result of the cook's superior knife skills, but most likely it's the product of a mandoline. It's construction is simple with a blade and an adjustable ramp which changes the thickness of the cut. Using a mandoline assures straight , symmetrical cuts of equal thickness. It's prefect for quickly slicing humble ingredients like a potato, or carrot, but it can also be used to create more elegant results. Here are a few examples of how I use the mandoline in my kitchen:


I like using the mandoline to create ultra thin sliced products which add a delicate elegance to a dish. One of my favorite examples is to create radish discs for use as a garnish. I usually slice a few radishes and then store them in water. They can be used to add elegance to  a dish or salad.

The mandoline is ideal for thinly slicing onions. I like to slice

red onions, add red wine vinegar and sugar to create pickled red onions. They can be stored for months and used for all sorts of garnishes such as salad toppings, plate garnishing, and addition to any appetizer plate.


Candied Lemon wedges


I use the mandoline to disguise the oft disliked Brussels sprouts into something more desirable. I find that most people seem to dislike the whole sprout, so I shred them using the mandoline. A simple preparation is to saute the shredded sprouts in butter, add some crushed toasted walnuts, a few drops of lemon juice, and salt/pepper. Voila! A simple side dish, and no one will guess that it's made with brussels sprouts. Below I used the sprouts as a garnish for the hangar steak.


Thursday, March 24, 2011

Ring Molds

We "eat" with our eyes just as much as with our sense of taste. The anticipation of how the food will taste is piqued with visual beauty. Some dishes such as stews are meant to be served with a rustic appearance, but some dishes, no matter how humble, can become elegant and desirable with the use of ring molds. Ring molds come in many shapes and sizes and are inexpensive. I have a set of square ones, a set of circular ones with serrates edges, and 2 circular ones that I use most frequently. You can
buy them at most kitchen stores and are usually found in the bakeware section. Below are a few examples of how I have used my ring molds to elevate my dishes to the next level:


Friday, February 18, 2011

The Scraper

The kitchen scraper is a common tool for bakers, but I had never used one until I went to Culinary School. At Le Cordon Bleu, each of us received one as a part of our issued "kit". It quickly became an indispensable part of my kitchen.I now use it for so many kitchen tasks both at home and at the restaurant that I wonder how I got along without one.

Here are some uses for this versatile and inexpensive tool:

-During prep on a cutting board, use the scraper to scoop up chopped herbs, onions, garlic, etc..
-Use to scrape work surface clean after preparing dough
-Use to scrape any work surface clean. Most useful if surface is a dark color that allow small food scarps to visually blend in.
-Use to scrape off dough from rolling pin
-Use to scrape the inner side of a sauce pan or pot above the food surface to prevent burning of residual food that is stuck on the sides of the pan.
-Use the rounded side of the scraper to scrape clean the contents of a bowl.
-Use the straight edge as a measuring device for cutting dough or sheets of pasta
-Use the straight edge to cut dough, pasta, etc...
-Use to remove or scrape off anything that is baked on a cookie sheet instead of using a spatula

I highly recommend trying one in your kitchen. It also make a great little gift. Scrapers come in many sizes and colors and are available at most kitchen stores. The one pictured above is the one that was issued to me at school and can be purchase at the following store for $4.38

Thursday, December 30, 2010

The Chinois

Have you ever wondered why creamy soups in a restaurant seem so much silkier than the soups you make at home? The secret behind that smooth silky texture is the humble chinois. A chinois, aka china cap, is a conical fine-meshed strainer which is a workhorse in the professional kitchen. It is used to strain stocks. All cream soups are passed through it, usually several times for extra refinement. Clam and mussel juices are "cleaned" by straining through the chinois. The egg mixture used to make pasta is passed through a chinois to remove any stray shells. All sauces are passed through a chinois. It's uses are infinite and restaurants employ the chinois to add that extra finesse to their dishes.


Prior to culinary school, I never had one, nor did I really see a need for it. Now it's an indispensable part of my kitchen. I use it every morning to strain my smoothie to create a luxurious texture. I was amazed to see the hundreds of berry seeds that were strained out the first time I used it. It's a must for home stock making. All my sauces are passed through it to remove chunks, impurities, and to create smooth delectable texture. They are not cheap. A good one will cost over $100, but with care it will last a lifetime. Make it a part of your kitchen, you won't regret it.


Saturday, November 20, 2010

Organization in the kitchen

I have been called a few things when it comes to my need to organize, plan, clean, etc...you can guess them all. However irritating my neatness needs may be to my loved ones, they do come in handy in the kitchen world. In fact, a lot of organizational habits and methods used in the professional kitchen are easily transferable to the home kitchen. I have a very basic kitchen in my home. I don't have granite counters, exotic appliances (except my espresso maker), not much counter space, not even a gas stove. Of course those things would be nice, but I get by and have even come to love my kitchen by optimizing what I do have. Here are a few tips for transforming your kitchen habits to that of a professional Chef and those of a professional kitchen.


I organize my food much the same way as a professional kitchen. I tag everything I prepare for future use with a label and expiration date. Whether it's my garlic confit or creme fraiche stored in the fridge, or my stocks which I store in the freezer. Tagging removes all doubts about freshness of foods hidden in the dark corners of your fridge/freezer.


Along with above, wouldn't it be really nice to have a list of things in your freezer? Or, a visual plan on what may be on your menu later in the week? I bought a status board much like what you would see in any restaurant kitchen where I can jot down my food ideas. Trust me when I say that we all have that latent  childhood desire to write and erase on the chalkboard. I keep a list of my freezer contents to help me with meal ideas. It's so nice to know what I have in there at a glance when I am brainstorming about meal ideas. Additionally, I use the board to write down dishes that I would like to make in the future as ideas come to me. I also use the board to list upcoming dishes for events, dinners, etc...I love it!

A professional kitchen has work stations for performing different tasks. I have created stations in my kitchen to mimic the restaurant kitchen on a micro level. Of course, space is a factor here. I have a prep station next to the sink, a pasta making station (that I break down when not in use), a coffee making station, a dough working area, etc...It really helps with efficiency and speed to develop a habit of performing tasks in the same location.

Recently I decided that I hate constantly digging in and out of cupboards to retrieve and put away stuff. Maybe the restaurant has influenced me in this direction, but I find it a waste to time. I am not only talking about plates, but pans as well. So, I went out and bought an industrial storage rack to house most of my plates, serving dishes, pans, etc..Additionally I hung a pot rack so that ALL of my cookware, chinois, tammis, etc.. are within easy reach when I need them. What a difference in the functionality of my kitchen! Aesthetically this may not be for everyone or every kitchen, but if it is, I highly recommend it.


I used to be in the habit of pulling out the oils, vinegars, etc..as I needed them at the stove, but at some point I realized that it's much more desirable to have all of those things permanently next to the stove. So, I got a tray to store all of my oils, salts, and peppers. Along with this theme, I bought squirt bottles to allow for a more finessed application of a sauce, or liquid just as they do in a professional kitchen.

Finally, I am always looking for unique ways to organize. Recently I created this rig to hang my pasta instead of using precious counter space. I just put in 2 hooks in the ceiling and some string. It's easy to dismantle and re install as needed.

I hope some of these ideas have been helpful. Beth rolls her eyes with some of my kitchen organization ideas, but I don't think she has much complaint with the final product. Happy cooking!

Friday, November 5, 2010

What has the past 12 months meant?

It was a year ago when I left for Le Cordon Bleu on a much anticipated deviation from my life's course. In the past 12 months I completed the Basic Cuisine course, interned at a restaurant for 10 weeks, currently going to the same restaurant once per week as a part time intern, and have practiced intensely at home on most of my days off. This afternoon I made the appetizer to the right. It is gougère filled with chicken remoulade. It incorporated making choux pastry, mayonnaise, roasting some chicken, and balancing the use of fine herbs, acid, and seasoning. Maybe it's not so complicated, but a year ago I could not have made any component of this appetizer without a recipe, nor could I have come up with the concept of the final product. This was something I came up with this morning at the gym and whipped it together this afternoon without the aid of a recipe.  As I was making the dish, It dawned on me that the past 12 months have been really significant in terms of advancing my cooking skills. Since returning from Le Cordon Bleu, I have avoided using recipes and have attempted to combine ingredients using the tools I acquired in school (braising, poaching, roasting, etc..) I have liberated myself from the crutch of recipes. I now use them to gain ideas for techniques and food combinations, but the days of being tightly tethered to a recipe line-by-line may be behind me. I have also practiced and read a ton since my return from school. This is not to imply that everything I have made has been stellar. In fact I have had LOTS of disasters but each mistake led to a lesson learned. LCB gave me the tools and the confidence to try new things and helped shed the fear of failure. Finally, the internship has allowed me to see those basic techniques refined beyond anything I had imagined. The restaurant has also helped me with more creative plating ideas. Bottom line is that ALL of the above are responsible for where I am today. I have SO far to go. I may be only an inch along a mile long journey, but after putting this plate together, it feels so good.