Thursday, March 22, 2012

Hommage to an Artist

A few months ago I commissioned my friend Steve Brummé to recreate (along with some artistic liberty) a vintage French absinthe poster in acrylic on a large canvas. Steve is a highly accomplished artist and teacher. It became a joke between us that my request was akin to asking Michelangelo to paint a cartoon, but Steve took it on as a unique and fun opportunity to recreate a piece of history from the turn of the Century France. He finished the painting this past week and allowed me to finally bring it home.


The poster. An advertisement for 
"La Poudre Montavon". An anti-alcohol powder that purported to cure alcoholism

An artist's work is such a personal endeavor. As a way to thank Steve, I wanted to do something equally personal, so I invited him to lunch at my house. I Tailored a light 4 course lunch centered around seafood:

Le menu du jour

1. Mixed green salad and micro greens with gala apple vinaigrette
2. Lobster cappuccino. This consists of lobster meat immersed in cream of celeriac soup, topped with a foam made from reduced cream that is steeped with the seared lobster shells and tomato paste then deglazed with brandy, Garnished with truffled mushroom shavings
3. Layers of salmon sashimi, smoked salmon, and blanched apples topped with pea shoots, apple, celery and jalapeño slices with a jalapeño emulsion.
4. Hamachi tartare with wasabi tobiko and a wasabi emulsion

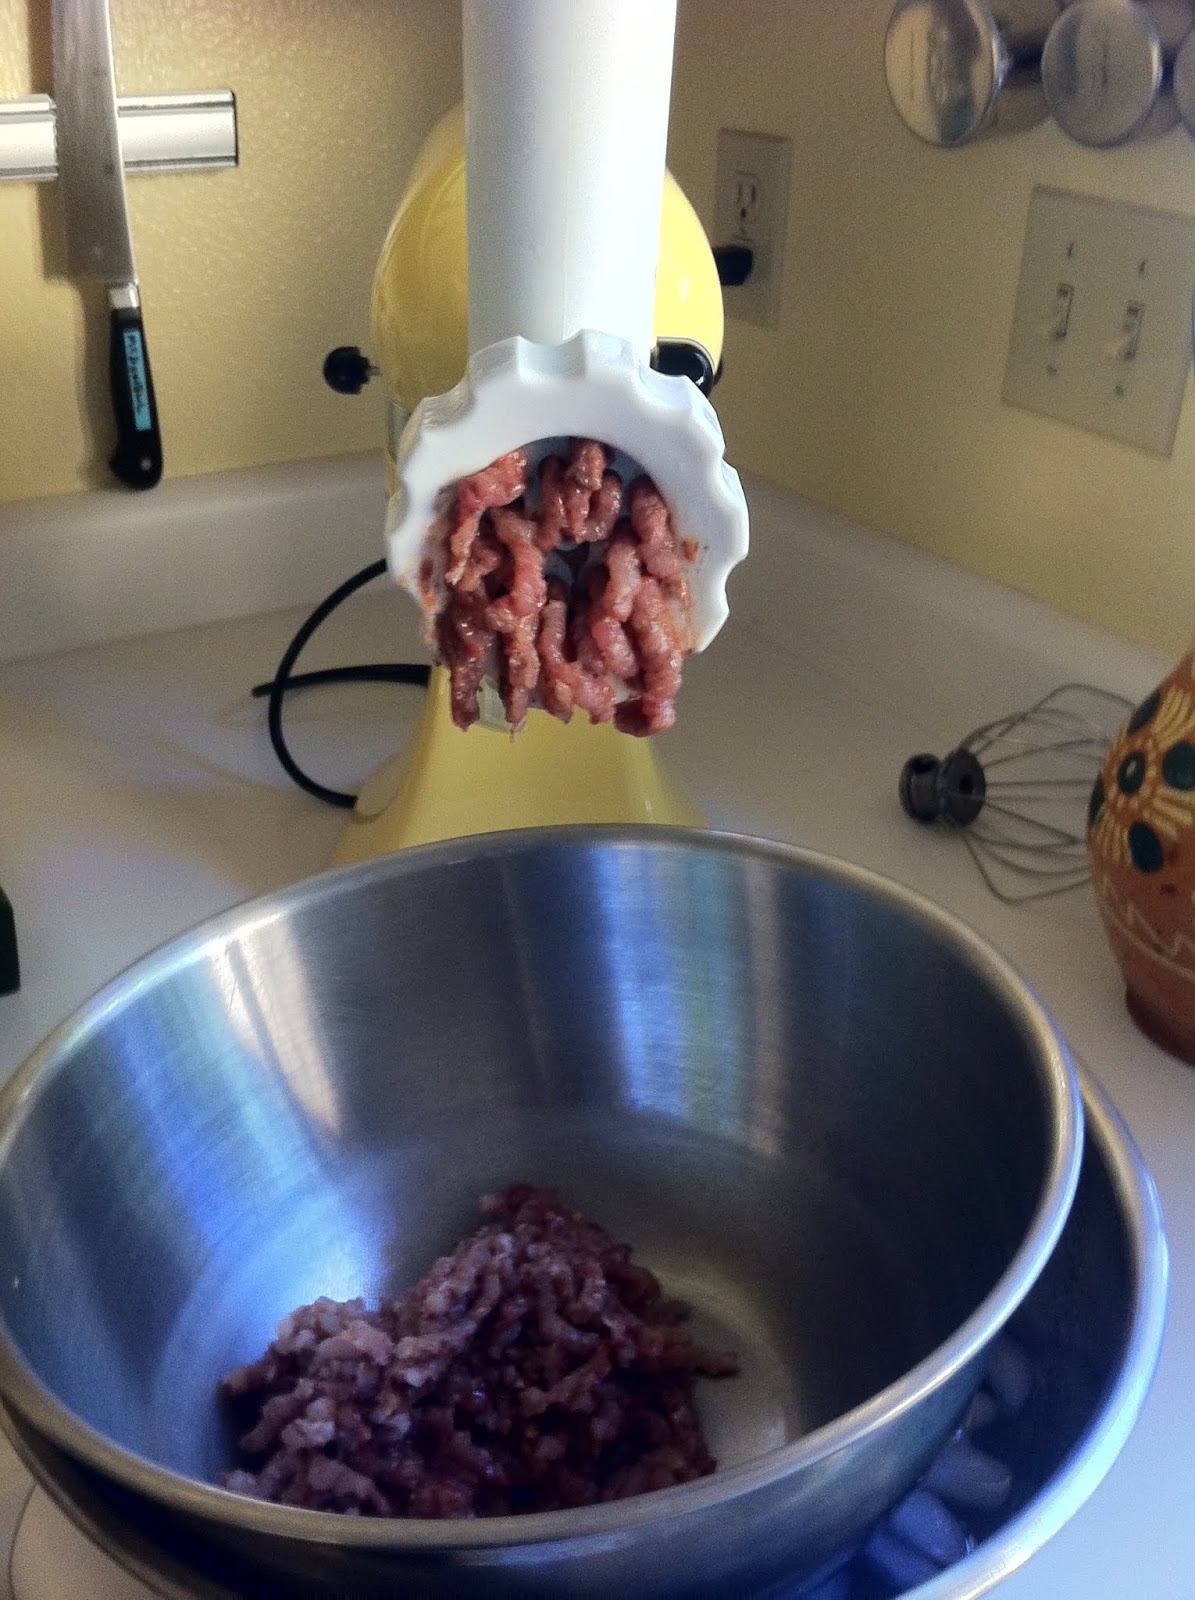
The secret behind putting this elegant lunch together was not any particular cooking skill, rather it relied mostly on organization, a little bit of knife skills, and lots of mis en place done ahead of time. Here is what my prep area looked like right before we kicked off the festivities:


mis en place


Steve in front of his work


Salad with gala apple vinaigrette


Lobster Cappuccino


Salmon Sashimi, Smoked Salmon, 
Blanched Apples with
jalapeño emulsion


Hamachi Tartare, Wasabi Topeka, 
and Wasabi Emulsion

Thanks Steve!


Wednesday, February 1, 2012

Ottolenghi

Just when I think I know a lot about food (which is ridiculous), I'm reminded that I actually know very little. I was at my neighbor's recently when I mentioned that I would be flying a trip to London. Their response was "Ottolenghi"! To which I said "Otto what"? My neighbors are the ultimate foodies with sophisticated palates and a cookbook library that rivals that of any large book store. They sent me home with 2 books from their shelves for me to explore.

 A fascinating story unfolds with the unlikely collaboration of two cooks who met in London. Yotam Ottolenghi from the Hebrew side of Jerusalem and Sami Tamimi from the Arab side of the same city did not know one another in Israel. Yotam, while awaiting the start of his PhD studies, decided to enroll at Le Cordon Bleu in London. Sami had also arrived in London to further develop his cooking skills in a more cosmopolitan city. They crossed paths and the rest is history. Together they have written one cook book "Ottolenghi: The Cookbook" and Yotam has written one on his own called "Plenty". "Ottolenghi: The Cookbook" prefaces with the statement that if you the reader do not like lemon, coriander, artichokes, and eggplants, then you will not like this book. The books are full of beautifully illustrated simple recipes with bright clean flavors. I immediately made 2 of the dishes and was sold.


They have 4 locations in London under the name "Ottolenghi" of which one is a proper sit-down restaurant and the other 3 are more of a deli/market style with limited seating. On my trip to London, I chose to go to one of the deli style establishments located in Notting Hill pictured above.
(Side note: only a few blocks away from the great Portobello market made famous by the movie "Notting Hill" with Hugh Grant).

The space is small, but if you love food, visually you'll be very attracted to what is on display. Similar to their cookbook recipes, their offerings are vibrant in color and pleasing to the eye. I chose to fill a small takeout box with 3 of the dishes on display to the right. I wish I had written all of the ingredients contained in each dish, but suffice it to say that they were all delicious and chocked full of fresh zesty flavors. I can't wait to go back again. If in London, you will not be disappointed with Ottolenghi.


Wednesday, November 9, 2011

Pumpkin Ravioli with Brown Butter Pineapple-Sage Sauce

I had already baked a pumpkin and harvested the flesh yesterday (and its juice), so today it was time to do something with it. I had decided to use some of the pumpkin to make a pumpkin ravioli. Pumpkin ravioli requires a delicate sauce to showcase the subtle flavors inside the ravioli which would otherwise be muted by a sauce too rich or strongly flavored. I almost hate using the brown butter sage sauce because it's beaten to death and all too common, BUT there is a reason for it. It's a delicious sauce that is delicate and pairs so well with pumpkin and squash. It's very simple to make. I added my own little twist by using a pineapple sage. It's a unique sage that smells just like pineapple. It was given to me by some friends a few months ago and is now thriving in my garden. It think it'll add an interesting flavor to the dish. (Thanks Charlie and Heather).

Filling Ingredients:

1 TBS Butter
2 Cups of baked pumpkin flesh
1 TBS shallots finely chopped
1 tsp garlic finely chopped
1 TBS dried sage
1 1/2 TBS Honey
1 tsp lemon zest
pinch of nutmeg freshly grated
1-2 TBS Parmesan freshly grated
salt and pepper
Serves 4


The pumpkin needs to be DRY so that it does not make the ravioli soggy. Blot it completely dry with paper towels. Chop it into small pieces


In a saute pan over med-med high heat, melt butter. Add shallots and sage and allow the shallots to slightly caramelize. Add the garlic and cook for 1 minute. Add the pumpkin and lightly season with salt and pepper and cook off more of its moisture for a few minutes. Remove from stove and empty contents into a bowl.

Add the remaining ingredients and taste. Adjust as necessary to make it to your liking. Place the filling in a pastry bag and place in the fridge.

Making Ravioli

The next step is to make the pasta. If you already know how to make pasta, skip down to the next picture. If not, I direct you to my post about making pasta when I wrote about Agnolotti with the following adjustment to the ingredients:

I normally use the following ratio for my pasta
100 g flour
1 egg
pinch of salt.

The egg introduces the necessary moisture for the pasta dough to form, but you can use any combination of liquids instead of using only egg. For this recipe I wanted to infuse the essence of the pumpkin into my pasta so I used the following ratio:

100g flour
1/2 egg
25 g baked pumpkin juice (that I saved from yesterday)
pinch of salt.

400 grams of flour makes enough for 4 medium sized servings. 

Pasta Ingredients:

400 g flour
2 egg
50 g baked pumpkin juice
4 pinches of salt


Roll out the pasta into thin sheets and cut them into strips as shown below. Lay them out on a floured surface


Pipe a dollop of the filling for each ravioli


place another sheet on top


Pinch the sheets together taking care to 
remove air bubbles


Pinch down the edges to seal in the filling


Use your ravioli cutter to form each ravioli


Peel


Scoop and place on a floured sheet tray


Bring a pot of salted water to boil


Fresh pasta only needs a few minutes to cook Al Dente


Place in a colander to drain while setting up the sauce

Sauce Ingredients:

2 TBS butter
several sage leaves
freshly grated parmesan for garnish
finely chopped chives
Salt and Pepper
Pineapple sage flower for garnish (optional)


On Med-Med High melt butter. Allow the butter to foam then add the sage leaves. Continue to cook until the butters slightly browns. It will have a wonderful nutty aroma at this point. Lower the heat and add the ravioli


Salt and Pepper to taste. Toss for a couple of minutes
on low heat


Plate and garnish with parmesan and chives. Enjoy!!


Tuesday, November 8, 2011

Pumpkins....What to do??

My garden is full of pumpkins and it's time to put them to use.

So, what can you do with all of the pumpkins after Halloween? There are many dishes you can make with the pumpkin, but here are a couple of savory ideas:

I wanted to make some savory dishes that all began with the same process of baking the pumpkins first. So I decided to get started with baking the pumpkin while I thought about what to make.


Preheat oven to 350

-Cut pumpkin into manageable sections
-remove soft flesh and seeds (set aside the seeds if you like baked seeds for later use)
-Place pumpkin sections on a sheet tray and drizzle with olive oil, salt and pepper.
-Place in oven and cook until the flesh is easily pierced with a fork and it is cooked
-Allow pieces to cool
-with a spoon, dig out the pumpkin flesh and place in a bowl. As you add to the bowl, you may notice some pumpkin juice accumulating in the bowl. Do not drain it as we'll be using the juice in on the dishes below.


I came up with cream of pumpkin soup, pumpkin risotto and pumpkin ravioli. Check out my next post for the ravioli recipe.

Monday, November 7, 2011

Lamb Meatball with Vin Cotto


I recently cooked for a winery event where we provided a bite-sized portion of food paired with our showcased wine which was a pinot noir. We chose to make lamb meatballs. It was a good choice with the onset of fall and rain in the wine country. I would not call this a fine dining appetizer, but it's a step up from the typical meatball with some atypical ingredients that combine for interesting flavors and a fun app to serve for an informal gathering. The meatball was served with Vin cotto, which in Italian means "cooked wine." It's an intensely rich, dark sauce that you should use judiciously, but used in correct proportion, adds a nice flavor to the meatball. You can find it at an Italian market or online VinCotto at Amazon. You can make a substitute form of it by reducing 2 cups red wine, 1/4 cup balsamic vinegar, and 2TBS of flavored dark fruit syrup like pomegranate or cherry syrup until the wine is reduced to a syrup. True vin motto is made from the grape must (the grape juice before fermentation) and lees (leftover grape seeds, skins after grapes are pressed) boiled down for 24 hours into a syrup and then placed in a barrel with a mother vinegar to age for 4 years.


Ingredients:
24 Servings

1 Lb ground lamb
1/4 Cup Olive Oil
1/4 Cup shallots, finely chopped
2 cloves of garlic, finely chopped
1/4 tsp pepper
2 tsp salt
1/4 tsp ground coriander
2 eggs
1/4 cup of bread crumbs (plain, no seasoning)
1/4 preserved lemon, finely chopped (buy your own or follow my recipe :Preserved Lemons)
1/4 cup pistachios, toasted and roughly chopped
1/4 cup olives, chopped
vin cotto for dirzzle

Directions:

Preheat Oven to 500

1. In a sauté pan heat olive oil on Med heat. cook garlic and shallots until translucent.
2. Add pepper, salt, and coriander and cook for 1 minute
3. transfer to a cool plate
4. In a large bowl, scramble the eggs with a fork, then add the cooled shallot mixture
5. Add the lamb to the egg mixture along with the bread crumbs, lemon, pistachios, and olives. Mix thoroughly until evenly incorporated.
6. Roll into bite sized meat balls.
7. Place on a cookie sheet and bake for approximately 10-12 minutes. The internal temperature should be 160 degrees.
8. Place on a toothpick or skewer and lightly drizzle with the vin cotto.

Applewood Inn and Restaurant

 I had just finished cooking at a winery event yesterday in the Russian River AVA (American Viticulture Area) so I decided to take a drive to soak up the beautiful fall colors of the wine country. If you have not visited the Russian River and Dry Creek region you owe it to yourself to visit in the fall. The colors may rival the changing of the leaves in the New England and the region is in the midst of grape crush with aromas of fermenting grapes permeating the air.

I had decided to meet some friends at Applewood restaurant which has held a 1 Michelin Star rating for two years now. It's located off the beaten path in the town of Guerneville. Applewood Inn. It's always fun to try Michelin rated restaurants for sake of comparison and to see what the fuss is all about!

The setting of the restaurant and Inn is beautiful. The restaurant offered a special "Russian River Night" menu with a 3 course meal for $30 - a good deal considering all of their entrees top the $30 mark. Corkage was free as long as the wine was from Russian River. Another great deal for a Michelin restaurant!


Last night's menu is pictured below. I always wonder how much of the Michelin rating is hype and how much is credited to the performance of the restaurant. So, I decided to be a critic in disguise.

The first course of butternut squash soup was excellent. I had just made a big batch at home and it was fun comparing it to mine. The soup garnish crispy sunchokes was really nice. All 6 of us enjoyed the soup.

The second course was goat cooked 3 ways: grilled, braised, and confit on a bed of lentils and spinach. Three waiters set our plates in front of us and the lead waiter explained the contents of the plate from left to right. It turned out that 1 of the plates had been placed upside down so his description of the meats didn't match. It's a small detail that didn't really bother me, but that's what Michelin ratings are all about-attention to detail. The grilled goat was tough and very chewy. The braised meat was delicious and tender, as is anything slow braised. I loved it. The confit was extremely salty in my opinion. When the course was finished, I noticed that all 6 of us had left some of the grilled goat uneaten.

The third and final course was a quince cake with almond creme anglaise - almost unanimously voted as dry by our group. It was good enough to finish however. I really liked the creme anglaise.

I want to say that overall I enjoyed my meal.  Our service was great and we received just the right amount of attention. I thought the price was good given what we had and the no-corkage was fantastic, but on this given night, I thought the execution was not deserving of the laurels bestowed upon this restaurant by the Michelin Guide.


How to create your own recipes

There are times when recipes and food combinations are the result of fortuitous luck, but most often sound recipes are the result of planned combination of harmonious ingredients "hung" on to fundamental cooking techniques. If you have a few cooking techniques in your cooking "toolbox", you too can come up with your own recipes. I think the biggest fear for most cooks is fear of failure. You need to get over that one! The worst case is that you end up throwing away the food, but it's important to realize that failure leads to success and knowledge. Every great cook has had LOTS of disasters.

I want to share a method by which you can go about creating your own recipes. I saw it demonstrated by Chef Grant Achatz. This is how he and his staff develop ideas for food combinations, flavors, and texture at his restaurant. My example will be a recipe I created for the upcoming post. The first step is to pick your star ingredient.  I wanted to use pumpkin. Next step is deciding on a technique and the vehicle to showcase the pumpkin. I decided to make ravioli. So, the techniques required are pasta making and more specifically making ravioli. I have those techniques in my "toolbox" so I am good to go.


Here is the fun part! I needed to come up with some ingredient combinations for the pumpkin filling.
Begin by writing you star ingredient in the center of a piece of paper or board. Next, write down all the ingredients that you think would go well with the main ingredient. Juts let your mind flow freely with all sorts of ideas, imagining flavors and textures as you write them down. Now step back and think big picture as you imagine how each ingredient would taste with the pumpkin and how they would taste with each other. In the case of my pumpkin ravioli filling I wanted complementing herb(s) so I thought I would use the chives and nutmeg. I could have used the sage, or rosemary, but I didn't want to meld too many competing flavors. I chose to incorporate shallots and garlic for a nice flavor foundation. I chose lemon zest to add a slight acidity to counter the sugar of the pumpkin. I chose chopped toasted walnuts because I wanted a textural crunch in the filling and the toasted flavor would be nice against the pumpkin, but I could have easily just gone with a smooth textured filling. Finally, I wanted somethings to bind it all together so I added parmesan cheese and egg yolks.

It's important to realize that this is only a starting point. It's just a plan. Always taste! I have not made this dish yet. So far it's just conceptual, but when I compose the filling, I may realize that it's off, or it's missing something. It may not have enough flavor, or it may need something more to keep it dry enough to be used as a filling. Maybe my pumpkin is not sweet enough and I'll need to add some form of sugar. It may be a disaster! The cool thing is that I'll learn from it and get it right on my own.

My palate and my experience may have led me in a direction that is completely different than your's. For example, ethnic cooking experience with Asian or Indian food may have led you to some interesting herbs that I am not familiar with. What I am saying is that, for the most part, there are no wrong or right answers here. Your imagination and your personal taste are the limit.

You can see that the more techniques you have at your fingertips, the more liberty you have with being creative. It's a good idea to study and practice the basics of baking, braising, poaching, roasting, and grilling. Once you know those basics, you can begin honing in on specialties like dough, pastas, forced meats, etc...I encourage you to shed your fears and experiment with your own recipes.

Monday, October 31, 2011

Butternut Squash Soup


I harvested a few nice pumpkins and squash from my garden yesterday and almost as if it had been scripted, the weather turned rainy and cool today with the wine country's first rain of the season. A hardy butternut squash soup was the perfect meal for a day like today.

The method behind making this soup is very simple. By understanding the basic sequence of steps, you can make many other types of soups by substituting different vegetables for the butternut squash. Some examples are cream of asparagus, cream of mushroom, cream of potato, cream of broccoli, cream of fennel, etc... you get the idea. Here are the basic steps:

1. sweat some form or combination of onions in a pan (onions, shallots, leeks)

2. add some celery and/or carrots.

3. add some garlic

4. deglaze with some alcohol appropriate in flavor to what you're making. As an example, in cream of fennel soup, deglazing with Pernod or Ricard is a perfect pair for the anise flavor of the fennel.

5. Add the vegetable. If the vegetable requires significant cooking to make it soft like the butternut squash, bake it in advance and then add it it at this time. But, say, for cream of mushroom, you can just add it raw at this point since it require very little cooking.

6. Add some stock appropriate to the soup. Most often either chicken stock or vegetable stock are the most appropriate.

7. Add some herbs and season with salt and pepper

8. Cook for 20-30 minutes

9. Add some cream and cook for another 10-15 minutes

10. Blend the soup to make it creamy.

11. you can choose to strain the soup for extra silky texture, or keep it slightly textured without straining.

Cream of butternut squash soup

Ingredients:

-2 TBS olive oil
-1 butternut squash
-1 leek finely sliced
-1 shallot finely chopped
-1 clove of garlic chopped
-1 celery stalk chopped
-1 Bay leaf
1 TBS chopped parsley
1 tsp chopped thyme
1/2 cup white wine
1/4 cup cream (I like heavy Cream)


Preheat the oven to 350
Begin by cutting the butternut squash in half lengthwise and remove the seeds and the soft flesh. Brush with some olive oil. You can season it with salt and pepper or just wait until the soup is all composed to do it. Place on a sheet pan and bake until you can easily insert a fork in the thick fleshy part of the squash.


While the squash is baking, Prep your shallots, leek, garlic, thyme, and parsley

Once the squash is baked, remove from the oven and using a spoon, dig out the flesh from the halves. Set aside.

Using a dutch oven or a pot, heat the olive oil on medium high heat. Add the shallots and leeks and sweat. Add the celery and sweat until it's all limp but not quite carmelized. Add the garlic and cook for a minute or so but do not allow the garlic to color. Deglaze with wine. Allow the alcohol to burn off. I just smell the pot until I no longer smell the alcohol evaporating off. 

Add the squash to the pan and mix with the onion mixture, add the chicken stock and herbs.

Bring to boil and then lower heat to a simmer. I like to taste at this point and add salt and pepper to taste. Remember that the soup will reduce slightly which will concentrate the flavors including the saltiness, so be careful not to over season. Cover and cook for 20-30 minutes

Add the cream and cook for another 10 minutes.

Taste and adjust seasoning with salt and pepper


You can either pour the soup in a blender and blend in batches, or use an immersion blender. Just blend the soup to a consistency that you like.


Garnish: 
I chose to garnish with a drizzle of cream and a fried sage leaf because sage pairs so well with butternut squash. Here are some other garnish options:

- few drops of olive oil
-toasted bread crumbs
-finely chopped fried bacon
-creme fraiche
-chopped herbs
-dollop of pesto
-chopped toasted nuts

There are lots of choices on ways to dress up the soup. Enjoy!


Wednesday, September 7, 2011

Rabbit and Chicken Liver Pâté

I made a pork terrine a few weeks ago and it was time to refine the method to make a Pâté. The difference being that a Pâté has a smoother texture and typically contains liver. I referenced Thomas Keller's Bouchon recipe as foundation for my technique with some modifications to make it my own recipe.

First, I made the spice blend. I followed the Bouchon ingredients exactly.

Spices:


1 TBS + 1 tsp black pepper corns
1 TBS + 1 tsp nutmeg
2 TBS kosher salt
1/4 tsp curing salt
1 TBS + 1 tsp fresh thyme
3 bay leaves


You can place all of them in a coffee bean grinder and grind. I hand grated the nutmeg, but did the rest in my bean grinder. Set aside.

Pâté:

1 Lb rabbit meat cut into 1" pieces
1 Lb chicken liver
1 Lb unsalted fat back (cut into 1" pieces)
8-10 thin bacon slices
1 cup whole milk
7 slices of white beard with crust removed.


I got a whole rabbit and sectioned it. I then harvested the best meat saving the remainder for other uses.   Trim the sinew from the livers. In a bowl, combine the rabbit meat and the liver and evenly mix in the spice blend. Cover and place in fridge for several hours. The remaining ingredients will be used later.

After several hours:


Take a terrine dish and lightly coat with a high temperature oil like grape seed, canola, or peanut oil. Take some plastic wrap and line the dish so that the excess wrap hangs over the edges. Next lay slices of bacon cross ways. The bottom will be the presentation side of the Pâté, so take the time to line the bacon slices carefully. I pushed the slices tightly against each other. You can also choose to slightly overlap the slices to prevent gaps.


Place milk in a bowl. Slice the bread in 1" cubes and immerse in the milk and insure that all of the bread is soaked. Set aside.


Set up grinder with a large dye. Set up a bowl in an ice water bowl to capture the ground meat. At this point remove some of the liver (maybe a 1/3 of the liver) and set aside in the fridge (I'll explain later.) Run the remainder of the meat/liver through the grinder. Next run the bread and milk through the grinder and completely mix with the ground meat/liver. 


Remove the meat mix from your bowl and place in another bowl. Clean the first bowl and replace it in the water bath. Change the grinder dye from the large to the small dye. Run the meat mixture through again. Run the fat back through the grinder and thoroughly mix with the meat mixture.

Preheat oven to 300

Binder:

2 egg yolks
2 TBS Madera (or cognac)

In a bowl, mix the egg yolks and madera with a fork. Add to the ground meat mixture and fold in with a dough spatula. Using the spatula, layer 1/2 of the mixture in the terrine dish on top of the bacon slices.


Retrieve the liver that you set aside earlier and randomly place on top the meat layer. This will add to the presentation when the Pâté is sliced.


Add the remaining meat mixture on top. Fold the bacon pieces over to cover. Keep in mind to minimize the overlap of the bacon because it'll be too thick, so trim with scissors as you need. Also, don't get too caught up in appearance as the top that you see now will actually be the bottom when the Pâté is un-molded after cooking. 


Next, fold the saran wrap on top and cover with the lid.


Place the terrine dish in a large casserole dish and fill with 
water to about 1/2 up the side of the terrine dish. Preferably warm water.


Place in oven and cook until the internal temperature is 160 degrees. As I mentioned in my previous post on making terrines, terrine dishes usually have a temperature probe hole in the lid to measure the temp without removing the lid. If you happen to be lucky enough to have an oven with a temp probe function, this becomes a simple task. Otherwise, you're looking at something around 1 1/2 hrs of cooking.

After reaching the desired 160 degree internal temperature, remove from oven, remove the lid, and place on a rack to cool for about 20 minutes. Drain the melted fat.

Cut a piece of cardboard (I used 2 for extra rigidity and better weight distribution) and wrap with foil. Find something to weigh down the Pâté. A brick is perfect.


Place the cardboard on top, weighted down by the brick.


Place in the fridge for at least 24 hrs. Two to Three days would be better. This is what it'll look like when you remove it from the fridge, and remove the brick and cardboard.


Pry open the saran wrap and unfold over the edges of the terrine dish


Next, tug on the edges of the saran wrap to unseat the Pâté from the terrine dish. Then take a large plate or cutting board and place on top of the terrine dish upside down.


Then flip


and un-mold


Remove wrap and Voila


It's a relatively easy process and not technical, just a little labor intensive. I assure you that the time spent is worth it. You can see the visual effect of layering the whole liver pieces in the middle. You can add various toasted nuts and/or dried fruit to add other flavors and more interesting presentations. Enjoy!